Monday, Aug 27, 2018

Multiple BMS Monitor
Every serious battery system, either static (as in power walls) or moving (as in cars or on bikes), small or large, any chemistry (Lead, NiMH, Lithium-ion), any form (block, pouch, 18650, 21700) needs a BMS - Battery Management System.
BMS is a device whose primary function is monitoring battery state and ensuring that battery works in optimal conditions under different loads. BMS monitors individual series in the battery pack and bigger the pack - more series need to be monitored. Because of the availability of affordable BMS devices that usually monitors up to 30 series, a practical solution would be to have multiple BMS devices combined to work in a network as one. I’ll show you how to build an app that monitors multiple BMS devices and displays aggregated results to the end user. It allows monitoring battery pack composed of an unlimited number of series.
Introduction
Today, prices of the batteries are lower than ever - especially for the lithium-ion batteries. Building your own electric bike or even a car isn’t expensive anymore, at least when the battery is in question. If you are doing ICE to EV conversion or building your own bike, you will probably get your hands on batteries, which is also true if you are building your solar system or off-the-grid home power supply. If you look for existing commercial solutions, you will end up spending big money and doing compromises regarding voltage, capacity, C rating, etc. So if you have some craftsman skills, building own pack looks like a good solution, but note that connecting all the cells into parallel and series groups is just a part of the job.
There is also a part where we monitor the pack, make sure that groups are balanced, and the pack doesn’t exceed critical temperature - all to maximize the life of the pack, and this is where BMS comes in. Again, if you look at available commercial solutions for higher voltages (for example 400 V), you will end up spending big money or time hacking one of the OEM BMS solutions (like Tesla, Nissan Leaf, or Opel Ampera). Although there is a community working on hacking these BMS systems, there is no complete working solution as of now.
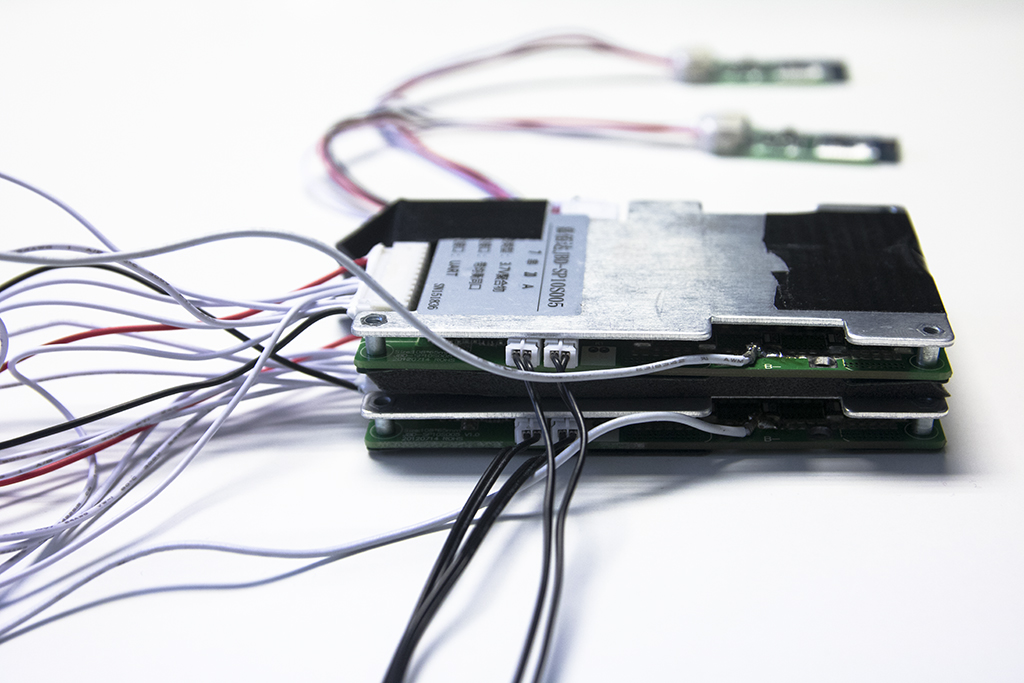
Another solution for the BMS problem is to use multiple accessible BMS devices on the same battery pack. If you try to find one of the affordable BMS units (e.g., for 30S configuration and manufactured in China), you will probably end up with a unit that can be described as generic Chinese BMS and looks like one in the picture below.

They all look almost the same - internals are pretty much the same, driver software is completely identical, they use the same serial protocol and set of commands, and have decent build quality. There are also various amperage ratings, and that usually dictates what you will find inside if you open it - the type of MOSFETs and controller chips. After you get your units and connect them to series groups, all you need is the app that will aggregate data from all units and control them all as one.
Hardware
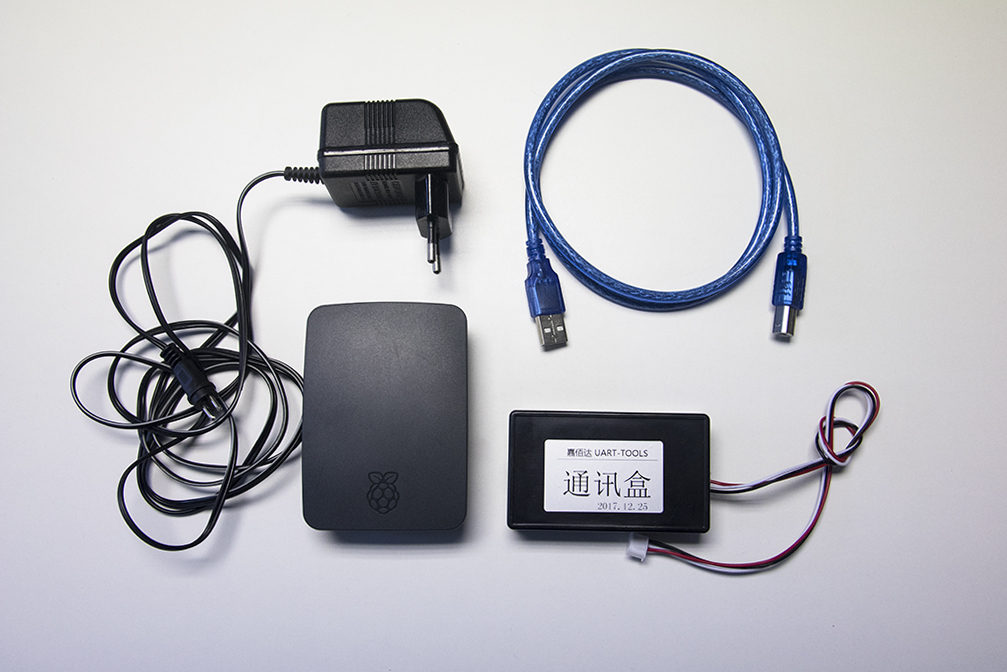
BMS units we will control can be described as generic Chinese BMS units. They are also described as smart BMS and come in various forms with the different series capability and amperage ratings. A unit has two temperature sensors, and a lot of built-in software functionality like charge/discharge MOSFET control, balancing control, configurable release delay for various thresholds, overcurrent, and short circuit protection… It is equipped with Texas Instruments chip BQ76940 and Atmega328 microcontroller. Online you can find a Windows app for controlling these units over serial port; it covers all of the functionality, and you can use it to control units over UART adapter and USB. It’s an easy job then to sniff traffic and decode commands with the help of com0com Null-modem emulator (you can find some of the commands decoded in the documents folder of this project in the spreadsheet file).

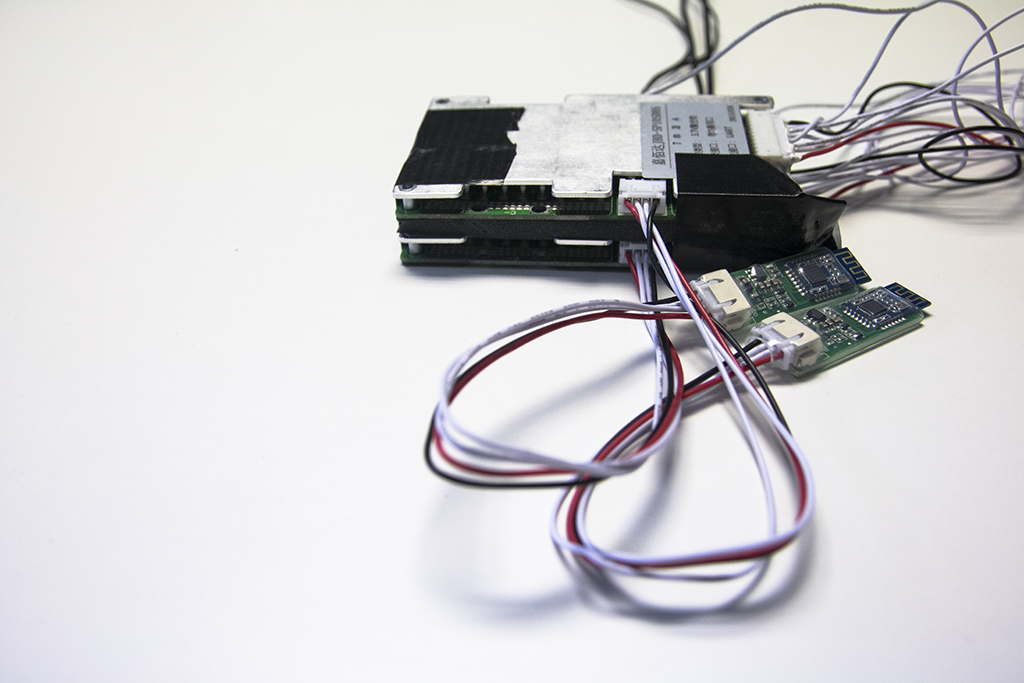
There is a Bluetooth module BLE option available which we will use to connect to the units. We will host our app on the Raspberry PI3 and use a Bluetooth connection to connect to all BMS units at once.

Software and Services
We are using the latest Jessie, Node.js, and JavaScript. We’ll start with a default project created with express-generator and do some cleanup and tweaks.
BMS application is designed as a single-page application (SPA).
Here is a list of main npm packages used:
- express web framework
- noble for BLE (Bluetooth Low Energy) communication - to use it on RPI3 we need to run Bluetooth in the compatible mode
sudo nano /etc/systemd/system/dbus-org.bluez.service
modify line:
ExecStart=/usr/lib/bluetooth/bluetoothd --compat
- socket.io We use Socket.io for the real-time communication between client app (web browser) and server on the Raspberry Pi
- forever - continuous script run
Functionality
This app is implementing monitor of the battery pack using multiple BMS devices connected over a Bluetooth connection. Communication is done using serial communication. There is a good description of this specific protocol by Simat. There is a logger part which stores all received information into log files and an UI part with various information and controls. It also implements parser for three type of commands.
The command that returns details about battery pack displayed on the Monitor page:
0xdd, 0xa5, 0x03, 0x00, 0xff, 0xfd, 0x77
the command that returns the voltage of each cell in the pack:
0xdd, 0xa5, 0x04, 0x00, 0xff, 0xfc, 0x77
and command that returns BMS device descriptive information like device custom name:
0xdd, 0xa5, 0x05, 0x00, 0xff, 0xfb, 0x77
Since we want to monitor multiple series in the pack with multiple BMS devices, we need to display some aggregate data to see all series as one big pack. We are monitoring totals of some data returned by each BMS unit.
- voltage - the sum of all voltages,
- current - average value of all current values,
- temp min & temp max - there are two temperature sensors on each of these BMS units, and if all are used to monitor cells as one pack then we need to be alerted of minimum and maximum temperature sensors are sensing (that will show if something is wrong with the pack)
- remaining & full capacity - the average of all values
There are three screens in the app (besides the standard menu navigation, you can use swipe actions on the top of the page to switch between the screens):
- Dashboard - displays gauges with various battery pack information. All data used in calculations are received from the BMS units (no external temperature sensors, current sensors, or GPS locators). There are buttons to start or stop monitoring. On the top left part of the screen, there is a gauge displaying Amps going in or out of the pack. Below is a gauge displaying current pack voltage. In the middle of the screen, the gauge is displaying a calculated value of kilowatts coming out or into the pack. On the top right part of the screen is the indicator of the current battery SOC percentage, and below that is the temperature gauge.

- Monitor - displays details about the battery pack. In the upper part of the screen, there is info about pack voltage, current, minimum and maximum temperature, remaining and full capacity. The lower part is displaying individual cell voltages, which can be retrieved by clicking the Read button.

- Debug - There are buttons to connect/disconnect Bluetooth devices - use those if you have trouble connecting at the start or to test the connection. If the signal is good and the connection is stable, all devices should be connected immediately with no delay, and all services and characteristics should be resolved instantly. There is also a box for sending custom commands and a log stream for some of the server events.

All commands (both sent by monitor by the user) are propagated to the all connected BMS units.
Project structure
+-bms
  +-bin
  +-documents
  +-logs
  +-public
  +-resources
  +-routes
In the root folder of the project, you will find app settings and app.js - entry point for the app. All the main code is in the bin folder, while the documents folder holds a spreadsheet with some messages decoded. Forever log file and all device log files will be stored in the logs folder. Log filenames are in the following format:
bmsname_yyyyMMddTHH_log_general.csv
bmsname_yyyyMMddTHH_log_cell.csv
In the public folder, you can find standard web stuff (CSS, JavaScripts, fonts, and index.html - the only page HTML source file). There is also app’s main javascript file bms main.js which contains all the HTML elements logic, element values update code, and gauges setup. Application icons in various sizes are in the resource folder (I used one available online), and the routes folder stores only one route defined - index.
Installation and Configuration
- Download and unpack the code
- Install the app using npm manager:
sudo npm install
- copy settings.json.sample to setting.json and edit the new file using nano (or similar) editor
cp settings.json.sample setting.json
nano setting.json
- Configure devices settings - In the sample settings you will see there are separate settings for read and write characteristics - different characteristics are a feature of the newer Bluetooth adapters. Older ones had only one characteristic which was used for both sending and receiving, so if you have an older adapter, you should be able to use the same value in both settings for the app to work.
The settings file is a simple JSON file, and in the
devicessection you can input as many devices as you want. To find values, you can use Windows Device Manager or bluetoothctl for Linux. - Configure monitor settings - refresh interval specifies milliseconds between sending commands, autoStart starts logging at app start, logToFile stores logs into files in the ./logs/ folder.
- To start the app, use npm (you will need to use sudo permissions because of the access to Bluetooth devices)
sudo npm start
If you want the app to run on startup, modify the rc.local file:
sudo nano /etc/rc.local
add:
cd /appfolder
forever start -m 5 -a -l /appfolder/logs/app_log.txt -c "npm start" ./
You can access the app on the localhost port 3001.
http://localhost:3001
The sample app is configured for 2x7S configuration, which will give about 56 V total. If you want to set up different values on gauges, edit lines 174 - 179 in bms main.js setGauges() function. This code is only a sample code and not production-quality by any means - use it at your own risk. Feel free to modify/distribute it as you want to suit your needs.