Wednesday, Jul 29, 2020

An introduction to SVG
An introduction to the basics of SVG syntax - learn how to write and read path code, and also hot to animate different shapes.
SVG was always catching my attention because it is flexible and smooth looking. As a web designer who spends most of his time writing CSS, I am always trying to draw and animate stuff with pure CSS. This allowed me to learn new and exciting stuff along the way, but occassionaly I stumbled upon some weird shape or a curve that’s impossible to implement using CSS only. SVG was always the best tool to solve that kind of challenges.
SVG path syntax and how to animate it
For all the newbies to web technologies, SVG is a XML based syntax which is used for vector graphics. If you ever used Illustrator, Figma or Sketch and picked a pen tool, basically that’s it. A pen tool is truly powerful, but sometimes can be difficult to use for beginners. We can refer to SVG in a similar way, it’s really powerful but sometimes it can be very confusing and complicated.
SVG means Scalable Vector Graphics and there are some pros and cons to it. It is not the best format if you need to present photos or realistic landscape images. It would be too complicated and too big for such purposes. JPG or some other raster-based formats would serve us better in such scenarios. However, if you need to show an illustration, icon or a simple shape with color change, SVG may be a way to go. It’s lightweight, code-based and scalable to any degree. Complexity is the crucial factor here. It is almost impossible to manipulate larger SVG images without vector-based tools like Illustrator. Working with larger SVG projects will require some time and patience to figure out how things work.
If we look at an SVG example, it can be intimidating at first. Therefore, we will use a step by step approach and everything should become easier as we go.
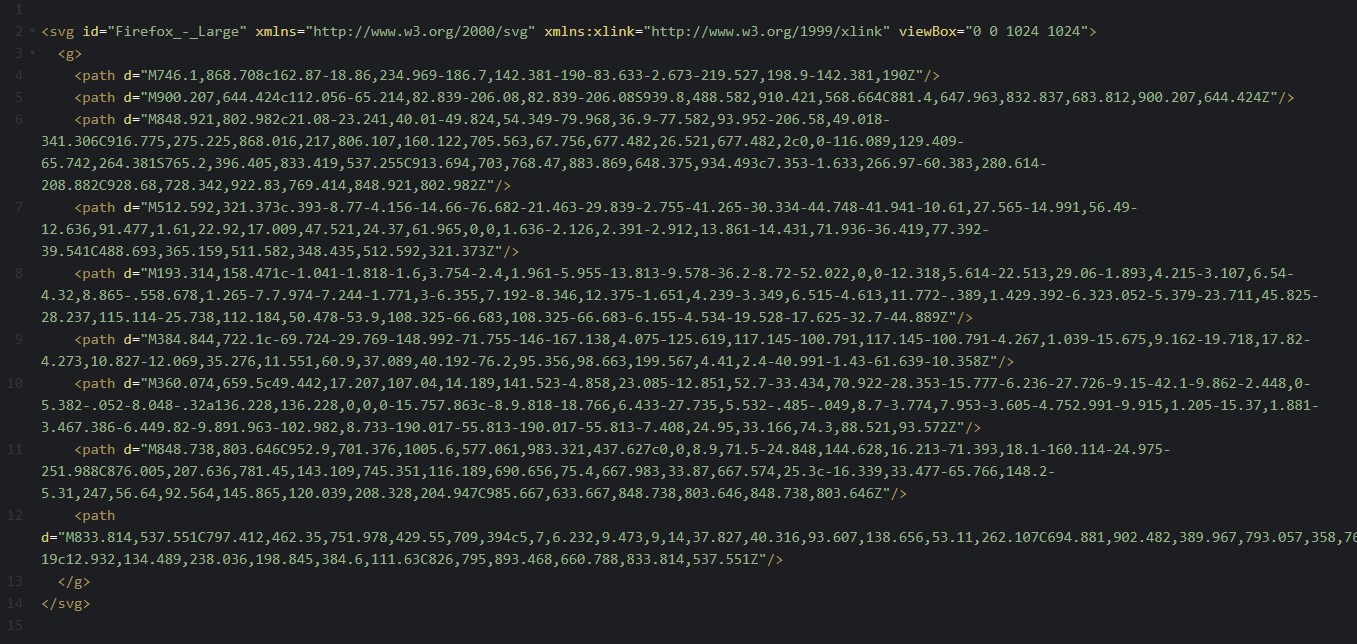 Example of a random SVG element
In this lesson, we are not explaining every attribute that can be seen, but most of the basics will be covered. Every element is defined by an SVG tag and there are a plenty of attributes to implement the functionality we need. One of the most common is “xmlns” which is not required for the SVG elements embedded in HTML, but if we use SVG as a stand-alone image, served as MIME (Multipurpose Internet Mail Extensions) type, we may need to add “xmlns” for parsing purposes. Another attribute is ViewBox which defines starting points and resolution of the element.
In the example above (click to enlarge), viewBox defines starting points which are top-left corner of the element (0,0) and resolution of the SVG which is 1024x1024, but that is relative because SVG is vector-based and we can stretch our elements without losing any quality. If we create a command: L1024 1024, it will draw a line over element because 1024 is 100% of the defined element. Don’t mix pixels with points in the viewport attribute because SVG - which is 200px wide - can contain 1024 points like in our example so we can say that points are just references for defining our drawing points (anchors).
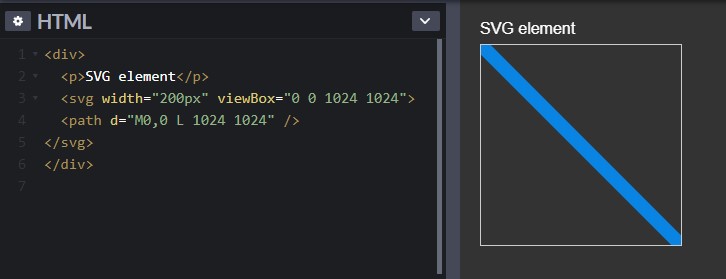 Example of a diagonal line across SVG
Now when we know something about SVG structure, it is time to introduce a couple of commands in the path element. First of all, commas are optional and they are present just for easier reading. Furthermore, there are four main commands: “m”, “l”, “h”, “v” and there are two variations of each: uppercase letters mean absolute change, and lowercase letters mean relative change. The logic behind absolute and relative change is matching the CSS position attribute principle. Absolute always starts from coordinates (0,0) and relative is referencing the last position of our anchor. There is one more command which is Z. It simply closes the path and capitalization doesn’t affect the end-result.
Here are commands which are drawing simple straight lines:
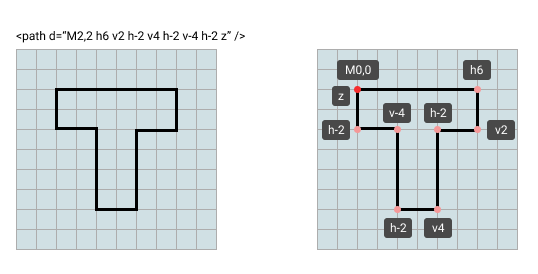
- M (x,y), m(x,y) - Moving the drawing anchor to the desired point within the SVG element.
- L (x,y), l(x,y) - Drawing the straight line between the current point and point defined on both axes.
- H (x), h(x) - Drawing a horizontal line. Y-axis is not important so we can define only the horizontal point which we want to reach.
- V (y), v(y) - Drawing a vertical line. The same principle applies here so we need to define only the Y-axis point.
- Z or z - Closing our path to the starting point.
Let’s do a simple exercise. The task is to draw a letter “T” and after that letter “L” using the same commands that we used for the first letter. That method will allow us to animate our letters with a little bit of CSS code.
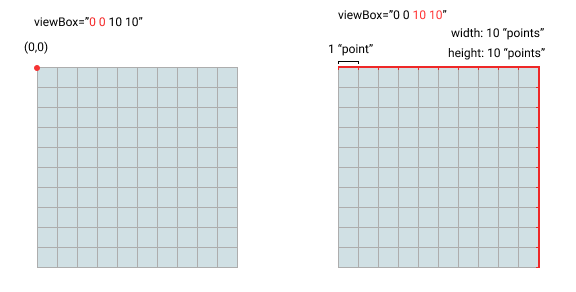
We need to define an SVG canvas.

First two numbers define a starting point and second number pair defines a resolution of a vector. We will use “point” to represent one unit in resolution.
Now we can implement the actual letters.
When the letter “T” is done, we will try to rearrange these points to form a letter “L”:
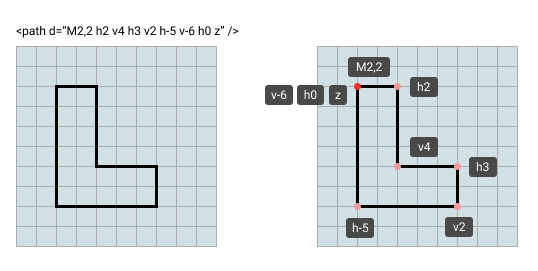
When paths are done, all we need to implement is a trigger to make a change between paths. Hover will fit this job nicely, so we don’t have to use any JS for this example. This is how it looks:
See the Pen SVG tutorial by Ivan Sakoman (@ssaakkaa) on CodePen.
Apart from straight lines, drawing curves with SVG is also possible, but is a bit more complicated and will be covered in the next blog post. Until then, you can try to draw something more complex or maybe even combine two separate paths. Let your imagination run wild with a little help from SVG!